|
|
Spice boxes, or chests, were popular among the Quakers of the Delaware Valley during the late seventeenth and throughout the eighteenth centuries, remaining fashionable in Pennsylvania long after falling out of style elsewhere. The boxes, fitted in the interior with banks of small drawers, were often displayed in the public rooms of homes, functioning as both a repository for small valuables, such as spices and silver items, and as a symbol of the family’s prosperity.
The cases were most often made of walnut, with inlay consisting of combinations of maple, boxwood, holly, cherry, walnut burl, locust, and red cedar set into the surface for contrast. Many of the inlay designs can be traced back to England and Wales, but the compass “line and berry” motif is unique to Chester County and reflects the influence of neighboring cultures such as the Pennsylvania Germans, known for their brightly painted geometric decoration on dower chests and related items.1 To properly appreciate these boxes, we must look past the sun-faded colors and centuries of wear and imagine a freshly constructed box with multiple shades of brilliantly contrasting white, red, and brown under a fresh coat of finish and wax. The steps below outline the process involved in creating the characteristic Chester County inlay seen on these boxes and other furniture forms from the region. |
|
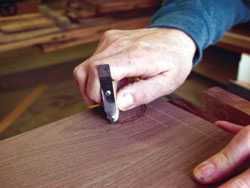
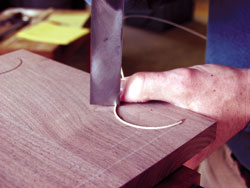
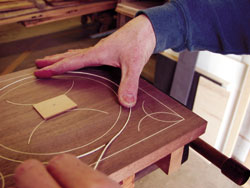
Step 1: The inlay design for the spice chest door is laid out with a compass. A radius tool is used to incise channels that will receive the inlay. Several strokes are required to cut to the proper depth. |
|
Step 2: A piece of holly “stringing” (a thin strip to be used as string, or line, inlay) is cut from a sawn piece of veneer. The strips will be set into the channels to create the “line” decoration for the line and berry design. |
|
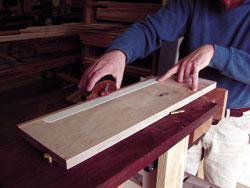
Step 3: The stringing is pulled through a planer gauge in order to size it to fit into the receiving channel. |
|
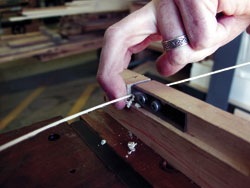
Step 4: The stringing is then measured to fit the channel, glued in place, and cut to length.
|
|
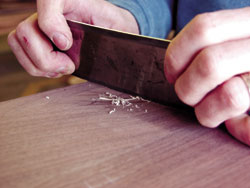
Step 5: The stringing is made flush with the surface using a metal card scraper. This is repeated for each section of string inlay.
|
|
Step 6: After fitting the inlaid corners, the outer border is installed. Step 6B: (not pictured) The corners of this section are mitered together when they meet. (The author was simultaneously working on several doors, so some images include sequences not yet explained.)
|
|
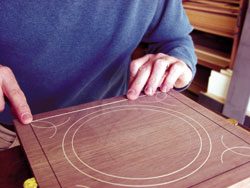
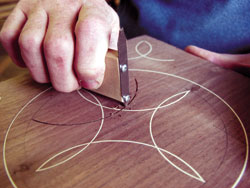
Step 7A: The inner circles are incised using a radius tool. The stringing is fit to the channel and mitered to hide the seam. |
Step 7B: The author uses a small piece of veneer, adhered to the center with hide glue, to prevent damage to the surface from the pivot point; the indentations left by some type of support are common on many original pieces. |
|
Step 8: The remaining components of the central pattern are completed.
|
|
Step 9: The “berries” are cut from aromatic cedar and holly using a small brass tube with teeth cut into the end. Original craftsmen may have spun a small carving gouge to punch out the berries.
|
|
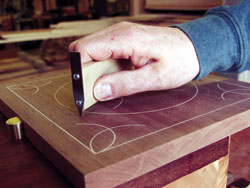
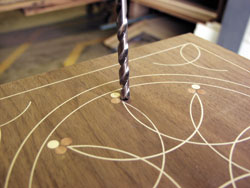
Step 10: As in the period, holes for the multicolored berries are bored with a bit. Each berry is set into the door and cut flush with a chisel. |
|
|
|
|
|
|
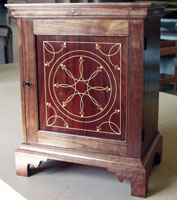
The completed line and berry inlaid door on a spice chest. |
Stephen Latta specializes in furniture of
the Federal period and teaches furniture making at Thaddeus Stevens College in Lancaster, PA.
Photography by Brad Adams
|
|
| 1 For a more thorough history, see Lee Ellen Griffith, The Pennsylvania Spice Box (Chester County Historical Society, 1986). |