|
 |
Turned wooden finials were often the crowning elements on fashionable furniture—such as high chests, desks and bookcases, and tall clocks—during much of the eighteenth and early nineteenth centuries.
Finials were made in an array of designs, determined in part by region, current fashion, and the type of furniture they embellished. The basic design for most finials is a sphere or urn surmounted with various turned shapes. The simpler forms were turned on a lathe; more refined examples with spirals or flickering flames were produced by turning and then carving. Elaborate finials could involve a turner, carver, and possibly a gilder, though typically one craftsman executed the woodworking and another
the gilding.
The following sequence demonstrates the process of producing a type of finial typically seen on furniture made in Massachusetts during the middle of the eighteenth century.
|
|
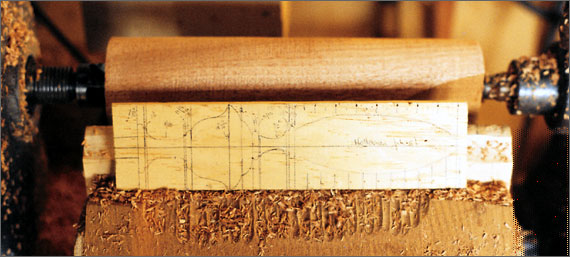
Step 1. A square piece of stock is first turned to the proper diameter. Guided by a pattern held against the stock, the sections are laid out on the spinning cylinder with a pencil or a scribe. This pattern was made directly from an original finial.
|
 |
 |
 |
|
|
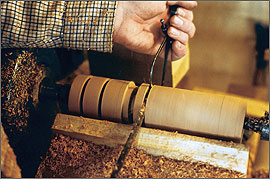
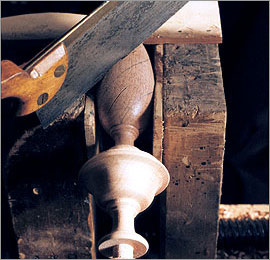
Step 2. The major elements are blocked out by holding a chisel against the stock as it spins toward the turner. Points where changes in diameter or design occur are measured with calipers, although much of the sizing of the elements is done by eye. Since finials were generally positioned 16 to 36 inches away from each other on the top of a case piece, the distance precluded the need for perfectly matching dimensions.
|
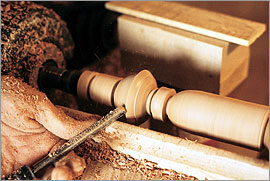
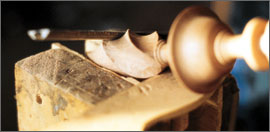
Step 3. Gouges or flat tools are used to give the finials shape. A trained turner uses as few tools as possible to increase efficiency, sometimes holding one tool under an arm and two tools in one hand. When the shaping of the urn is completed, the sharp tools of the turner will have left a finish as smooth as glass on the wood, requiring only a burnishing with wood shavings held against the finial as it spins.
|
|
 |
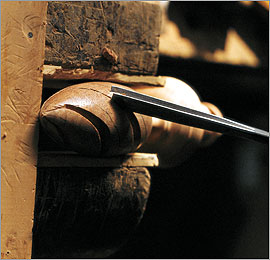
Step 4. The layout of the spiral is accomplished by drawing a grid on the section to be carved, then diagonally connecting the lines to create the desired spiral. The “fin,” or division between the flutes (the hollow shaping), will be the only turned surface visible after the carving is complete, therefore these lines must be carefully drawn.
|
 |
|
 |
|
|
Step 5. A saw cut, or kerf, is made up the center of each flute so that the excess wood can be easily released while carving; if no such cuts were made, a piece might break off and destroy the finial. Each kerf also serves as a gauge to determine how far down the carver needs to cut before reaching the desired depth of each flute.
|
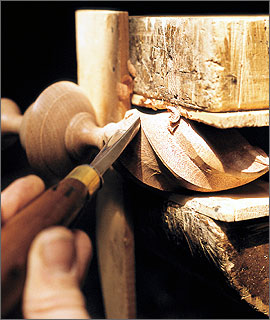
Step 6. The initial sculpting of the spiral is done with a parting tool, which leaves a V-shaped cut as it removes the bulk of wood between the bottom of the flute and the fin. The shaping is done while the finial is held in place. The work must proceed up the right-hand side of the flute and down the left in order to cut the wood fibers smoothly. Wood essentially consists of a tightly packed bundle of long fibers that will either tear out or easily shear off, depending on the direction of the cut.
|
|
 |
|
 |
|
|
Step 7. The parting tool is used to widen the flutes of the flame; in this process, it is important to avoid the fins. The fins are very susceptible to breaking and their finishing must be left until the end.
|
Step 8. As the flutes continue to widen, the spiral begins to take shape. Using a parting tool, the carver makes opposing cuts along one side and down the other. At this point the finial resembles less-sophisticated examples finished without the use of a gouge.
|
|
 |
|
 |
|
|
Step 9. The parting tool is set down in favor of a gouge, which is curved and shaped in the form of the finished flutes. A curved tool pushed through the wood will create a curved surface in its image, so tools having the closest radius to the hollow of the flute will be used.
|
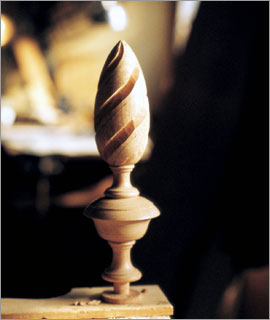
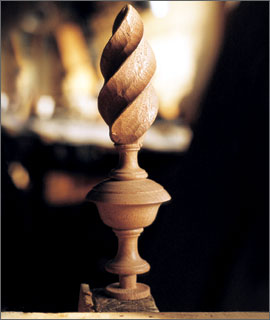
Step 10. Here the flutes are nearly complete. The shaping has been done with gouges that run up one side of the flute and down the other. The size of the gouges used decreases toward the top as the flutes become narrower. Ideally, the hollow of the flute will be the result of two cuts that meet at the bottom of the flute.
|
|
 Step 11. To remove any imperfections left from carving and to give the flutes a perfect finish, a rounded rasp or wood file is used. When laid diagonally in the hollow, the rasp will actually smooth the entire flute from one edge to the other. Because its fine teeth will not tear the grain of the wood, the rasp can be used in any direction. In the period, some craftsmen were meticulous in the smoothing process, using glasspaper, sharkskin, wood, or metal burnishers after the rasp. Step 11. To remove any imperfections left from carving and to give the flutes a perfect finish, a rounded rasp or wood file is used. When laid diagonally in the hollow, the rasp will actually smooth the entire flute from one edge to the other. Because its fine teeth will not tear the grain of the wood, the rasp can be used in any direction. In the period, some craftsmen were meticulous in the smoothing process, using glasspaper, sharkskin, wood, or metal burnishers after the rasp.
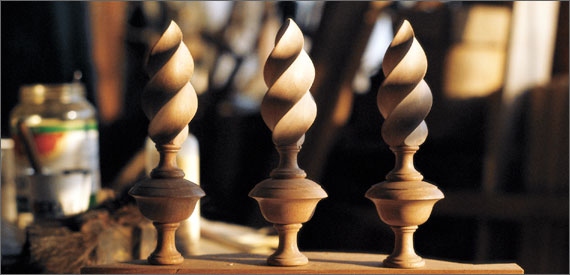
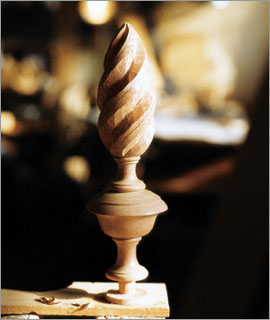
Step 12. Shown here is a set of two finials and one reject. A mistake in the number of turns that the flame made in its upward spiral meant that the finial on the right could not be used with the other two. These finials have been sanded with very fine paper. Once smooth, a common period practice was to tint the finials with a stain and finish them with a varnish, shellac, oil, or wax. Although these finials are made in one piece, others were made in two or even three parts so that the carved elements could be more easily produced.
Hands-On is a feature that explores the process of handcraftsmanship through step-by-step analysis.
Allan Breed is a furniture maker and carver based in Rollinsford, New Hampshire, who specializes in historic reproductions and custom furniture. He teaches and lectures regularly on his craft and evaluates furniture for collectors.
|
|
|
|
Antiques and Fine Art is the leading site for antique collectors, designers, and enthusiasts of art and antiques. Featuring outstanding inventory for sale from top antiques & art dealers, educational articles on fine and decorative arts, and a calendar listing upcoming antiques shows and fairs.
|